
This is the second in this series of posts highlighting some of the differentiators between Capture One and Lightroom. As with the first, if you’re reading this, the likelihood is that you are or were recently a Lightroom user and are curious about a better software solution with which to treat your images. “Better,” of course, is somewhat subjective overall, but less so with specific features, and though that quest to find the best software is not necessarily an easy one, it is necessary. While you may change camera bodies, lenses, lights, locations, and styles, the one constant that touches all of your images is the software used to develop them. And though both are raw processors, Capture One and Lightroom are not the same in terms of feature set, general performance parameters, and approach – each with their particular strengths.
Capture One is multifaceted image processing and asset management software. As a raw processor, it is considered the gold standard, but without using it and experiencing the software some of its unique qualities can sometimes be less obvious to see, and comparative articles are often bathed in ambiguity to be suggestive rather than declarative — enough that it makes delivering unequivocal statements a near impossibility. Here, however, we’ll be direct and quickly highlight a few things Capture One has/can do that Lightroom doesn’t/cannot.
I highly recommend you click here for a 30-day full trial of Capture One Pro so you can follow along — seeing is believing, after all.
Luminosity Curve
This is a big one, and one of those features that can hook someone on Capture One just because of it. It is true, later versions of Lightroom have a degree of control with Luminosity, but Capture One’s are vastly more developed, more akin to Luminosity blending mode in Photoshop, and Lightroom does not have Luma Curve at all. So what is it?
It’s a curve tool that appears as all curve tools you’ve seen before, but rather than adjusting the RGB values all together or by channel, the Luma Curve tool adjustments only affect the luminosity values. In a concise statement, Luma Curve allows you to precisely control tones separately from color.

This is significant because as you adjust the lightness and darkness values with curves or any other way, you are adjusting contrast, and contrast has a direct effect on hue and saturation. So as you use a standard Curve tool, you’ll be introducing shifts to the color and saturation, but with Luma Curve you’re only adjusting the contrast without changing color; so it’s a matter of tones versus color.
There is, perhaps, no more obvious place to see this than when adjusting skin or color managed products, and so it’s common to find Capture One’s luminosity controls among the top favorite features of portrait, fashion, studio and wedding photographers who use Capture One. See the example below
Both processed images have precisely the same curve values applied, but one is using the RGB curve and the other the Luma Curve. As you can see, there is a significant difference in both hue and saturation with the RGB Curve, and correcting that takes time and effort.
Multiple Simultaneous Export
Capture One’s export options are incredibly vast, and it can be the source of some intimidation at first, but the benefit of having all those options is that there is so much that can be done with it. One such thing is its ability to export with multiple “Process Recipes.”
For Lightroom users, it’s best to think of Process Recipes as Lightroom’s export presets, except with Capture One you can export multiple versions of your images simultaneously, and use metadata to generate subfolders. Here’s an example of how this would look in practice:
Once ready to export an image, you can set it to export a full PSD or TIFF file to store in your back-ups, as well as a reduced JPEG with metadata and watermark for publishing, and a version that is perfectly scaled for Instagram all at once.
You can also set parameters for specific metadata – like camera model/body, lens model, keywords, subject – so that upon exporting Capture One will create sub-folders for each or all. If you like to keep organized and save time, this is a huge help. Click image below to enlarge and see the Process Recipes panel on the left.
Session Based Workflow
Most basic introductions to Capture One will list the significant differentiators between is and Lightroom by highlighting the interface and Sessions versus Catalogs, and for good reason. Think of them in terms of use-case scenarios, wherein Lightroom you typically will use a Catalog for all your images; Sessions are typically for a particular photo session. For example, maybe you have a catalog set up to cover an entire calendar year of weddings, a Session would be used to keep all the assets of one wedding in their own separate, safe, and organized world.
Sessions are Sessions have been the default method of organizing since the start of C1 and remain the go-to workflow used by nearly all pro production, studio and commissioned photographers, and are a completely different way of organizing and managing images than catalogs.
*Though if you want to go the catalog route as in Lightroom you can, of course, do that with Capture One also, and anyone who was told Capture One doesn’t work with catalogs hasn’t used it since Version 6, and we’re on 12 right now. Also, you can import sessions into C1 catalogs for hybrid workflows.

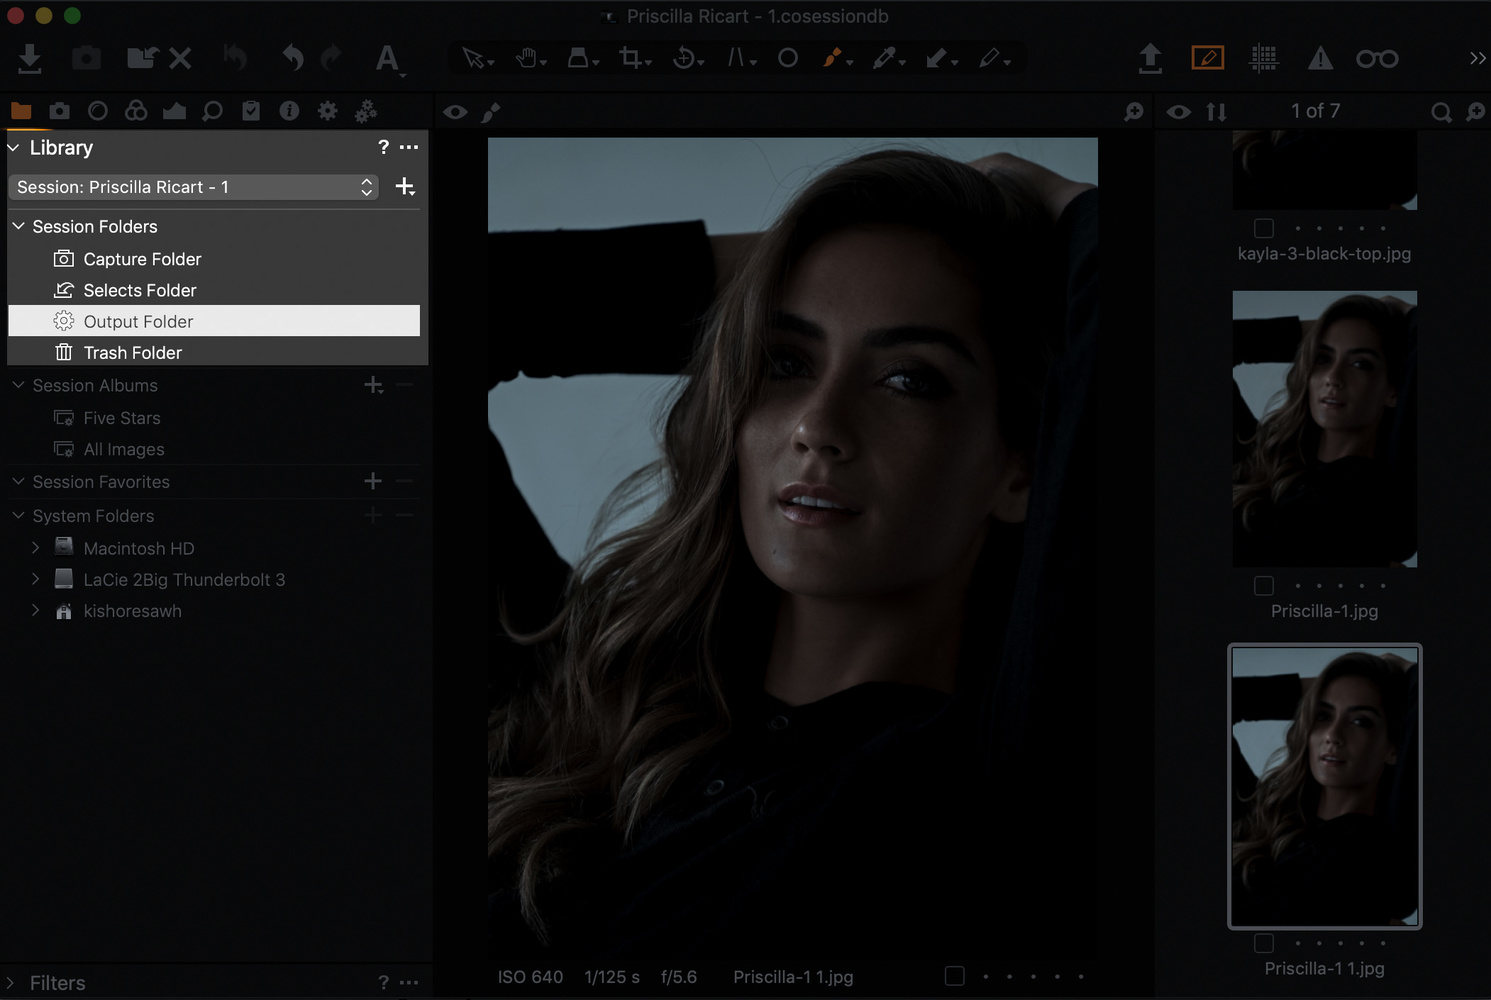

When you create a new Session, Capture One will automatically create a folder structure for you that will have the parent folder (name of your shoot, perhaps), and cascading from that will be folders for Capture (where all images are copied/imported into), Selects, Output, and Trash. And yes, you can create more folders in the structure to suit your needs, but this is the basics and tends to be most what you’ll need. You can see how the various folders are reflected in the application and your OS in the images above.
The benefits of sessions are plentiful, and we’ll explore all the ways they differ from catalogs in another post, but Sessions are easier and cleaner for organization, offer greater security in case of corruption of a drive, easily portable between computers, better image privacy, easier file management between teams, and offers simple adjustment backups.
Conclusion
There are tons of varied and deeper ways Capture One is different than Lightroom. We’ll address more in the near-future, but while I can list them off, there’s no better way to understand the differences than using it.
If you don’t have Capture One, this is the perfect time to try it, and you can click here for a 30-day full trial of Capture One Pro, or, if you’re a Fujifilm or Sony shooter, click here to download Capture One Express for free so you can follow along.
